7、React高级(二)
7、React高级(二)
1.组件优化
1.1 shouldComponentUpdate 优化
在我们之前一直写的代码中,我们一直使用的Component 是有问题存在的
- 只要执行
setState,即使不改变状态数据,组件也会调用render - 当前组件状态更新,也会引起子组件
render
而我们想要的是只有组件的 state 或者 props 数据发生改变的时候,再调用 render
我们可以采用重写 shouldComponentUpdate 的方法,但是这个方法不能根治这个问题,当状态很多时,我们没有办法增加判断
看个案例来了解下原理:
如果你的组件只有当 props.color 或者 state.count 的值改变才需要更新时,你可以使用 shouldComponentUpdate 来进行检查:
class CounterButton extends React.Component {
  constructor(props) {
    super(props);
    this.state = {count: 1};
  }

  shouldComponentUpdate(nextProps, nextState) {
    if (this.props.color !== nextProps.color) {
      return true;
    }
    if (this.state.count !== nextState.count) {
      return true;
    }
    return false;
  }

  render() {
    return (
      <button
        color={this.props.color}
        onClick={() => this.setState(state => ({count: state.count + 1}))}>
        Count: {this.state.count}
      </button>
    );
  }
}在这段代码中,shouldComponentUpdate 仅检查了 props.color 或 state.count 是否改变。如果这些值没有改变,那么这个组件不会更新。如果你的组件更复杂一些,你可以使用类似“浅比较”的模式来检查 props 和 state 中所有的字段,以此来决定是否组件需要更新。React 已经提供了一位好帮手来帮你实现这种常见的模式 - 你只要继承 React.PureComponent 就行了。
1.2 PureComponent 优化
这段代码可以改成以下这种更简洁的形式:
class CounterButton extends React.PureComponent {
  constructor(props) {
    super(props);
    this.state = {count: 1};
  }

  render() {
    return (
      <button
        color={this.props.color}
        onClick={() => this.setState(state => ({count: state.count + 1}))}>
        Count: {this.state.count}
      </button>
    );
  }
大部分情况下,你可以使用 React.PureComponent 来代替手写 shouldComponentUpdate。但它只进行浅比较,所以当 props 或者 state 某种程度是可变的话,浅比较会有遗漏,那你就不能使用它了。当数据结构很复杂时,情况会变得麻烦。
PureComponent会对比当前对象和下一个状态的prop和state,而这个比较属于浅比较,比较基本数据类型是否相同,而对于引用数据类型,比较的是它的引用地址是否相同,这个比较与内容无关
state = {stus:['小张','小李','小王']}

addStu = ()=>{
    /* const {stus} = this.state
    stus.unshift('小刘')
    this.setState({stus}) */

    const {stus} = this.state
    this.setState({stus:['小刘',...stus]})
}注释掉的那部分,我们是用unshift方法为stus数组添加了一项,它本身的地址是不变的,这样的话会被当做没有产生变化(因为引用数据类型比较的是地址),所以我们平时都是采用合并数组的方式去更新数组。
1.3 案例
import React, { PureComponent } from 'react'
import "./index.css";
export default class A extends PureComponent {
state = {
username:"张三"
}
handleClick = () => {
this.setState({})
}
render() {
console.log("A:enter render()")
const {username} = this.state;
const {handleClick} = this;
return (
<div className="a">
<div>我是组件A</div>
<span>我的username是{username}</span>
<button onClick={handleClick}>执行setState且不改变状态数据</button>
<B/>
</div>
)
}
}
class B extends PureComponent{
render(){
console.log("B:enter render()")
return (
<div className="b">
<div>我是组件B</div>
</div>
)
}
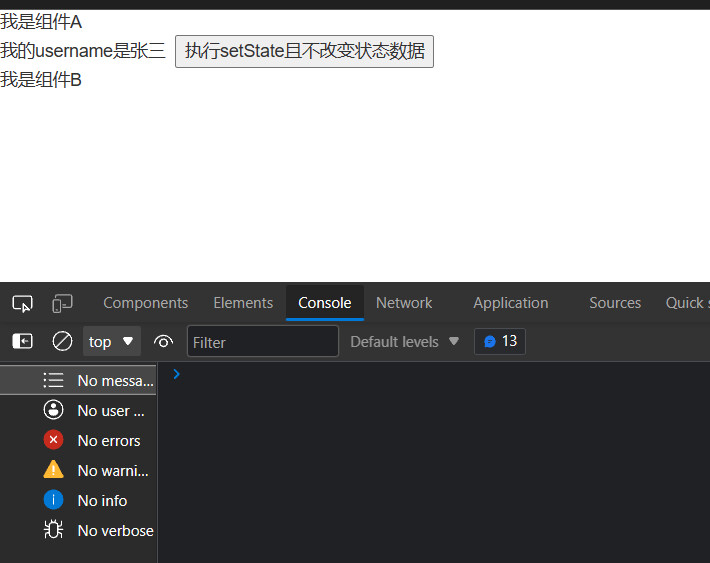
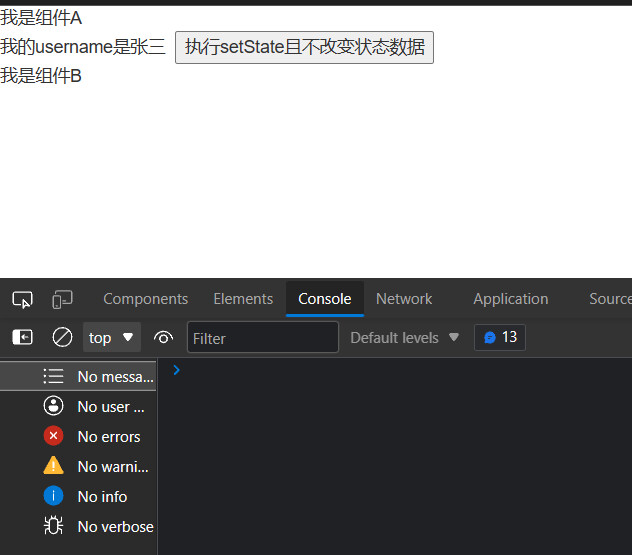
}点击按钮后不会有任何变化,render函数也没有调用

修改代码
handleClick = () => {
    this.setState({
      username: '李四',
    })
}点击按钮后只有A组件的render函数会调用

修改代码
handleClick = () => {
    const { state } = this
    state.username = '李四'
    this.setState(state)
}
点击后不会有任何变化,render函数没有调用,这个时候其实是shouldComponentUpdate返回的false。
2.Render Props
如何向组件内部动态传入带内容的结构(标签)?
Vue中:
	使用slot技术, 也就是通过组件标签体传入结构  <AA><BB/></AA>
React中:
	使用children props: 通过组件标签体传入结构
	使用render props: 通过组件标签属性传入结构, 一般用render函数属性
children props
render() {
    return (
            <A>
              <B>xxxx</B>
            </A>
    )
}


问题: 如果B组件需要A组件内的数据, ==> 做不到
术语 “render prop” 是指一种在 React 组件之间使用一个值为函数的 prop 共享代码的简单技术
采用 render props 技术,我们可以像组件内部动态传入带有内容的结构
当我们在一个组件标签中填写内容时,这个内容会被定义为 children props,我们可以通过
this.props.children来获取
例如:
<A>hello</A>这个 hello 我们就可以通过 children 来获取
而我们所说的 render props 就是在组件标签中传入一个 render 方法(名字可以自己定义,这个名字更语义化),又因为属于 props ,因而被叫做了 render props
<A render={(name) => <B name={name} />} />
A组件: {this.props.render(内部state数据)}
B组件: 读取A组件传入的数据显示 {this.props.data}
你可以把 render 看作是 props,只是它有特殊作用,当然它也可以用其他名字来命名
在上面的代码中,我们需要在 A 组件中预留出 B 组件渲染的位置 在需要的位置上加上{this.props.render(name)}
那我们在 B 组件中,如何接收 A 组件传递的 name 值呢?通过 this.props.name 的方式
export default class Parent extends Component {
	render() {
		return (
			<div className="parent">
				<h3>我是Parent组件</h3>
				<A render={ name => (<B name={name}/>) }/>
			</div>
		)
	}
}

class A extends Component {
	state = {name:'tom'}
	render() {
		console.log(this.props);
		const {name} = this.state
		return (
			<div className="a">
				<h3>我是A组件</h3>
				{this.props.render(name)}
			</div>
		)
	}
}

class B extends Component {
	render() {
		console.log('B--render');
		return (
			<div className="b">
				<h3>我是B组件,{this.props.name}</h3>
			</div>
		)
	}
}
3.Portal
Portal 提供了一种将子节点渲染到存在于父组件以外的 DOM 节点的优秀的方案。
李立超老师的博客
这篇博客对于Portal的引出我觉得写的很好
3.1 问题的引出
在React中,父组件引入子组件后,子组件会直接在父组件内部渲染。换句话说,React元素中的子组件,在DOM中,也会是其父组件对应DOM的后代元素。
但是,在有些场景下如果将子组件直接渲染为父组件的后代,在网页显示时会出现一些问题。比如,需要在React中添加一个会盖住其他元素的Backdrop组件,Backdrop显示后,页面中所有的元素都会被遮盖。很显然这里需要用到定位,但是如果将遮罩层直接在当前组件中渲染的话,遮罩层会成为当前组件的后代元素。如果此时,当前元素后边的兄弟元素中有开启定位的情况出现,且层级不低于当前元素时,便会出现盖住遮罩层的情况。
const Backdrop = () => {

  return <div
           style={
                  {
                    position:'fixed',
                    top:0,
                    bottom:0,
                    left:0,
                    right:0,
                    background:'rgba(0,0,0,.3)',
                    zIndex:9999
                  }
                }
           >
  </div>
};

const Box = props => {

  return <div
          style={
              {
                width:100,
                height:100,
                background:props.bgColor
              }
            }
           >
             {props.children}
           </div>
};

const App = () => {

  return (
  		<div>
            <Box bgColor='yellowgreen'>
            <Backdrop/>
            </Box>
            <Box bgColor='orange' />
  		</div>;
  )
};
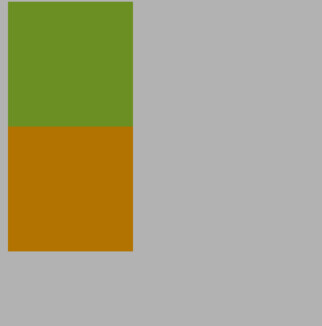
上例代码中,App组件中引入了两个Box组件,一个绿色,一个橙色。绿色组件中引入了Backdrop组件,Backdrop组件是一个遮罩层,可以在覆盖住整个网页。
现在三个组件的关系是,绿色Box是橙色Box的兄弟元素,Backdrop是绿色Box的子元素。如果Box组件没有开启定位,遮罩层可以正常显示覆盖整个页面。

Backdrop能够盖住页面
但是如果为Box开启定位,并设置层级会出现什么情况呢?
const Box = props => {

  return <div
           style={
                  {
                    width:100,
                    height:100,
                    background:props.bgColor,
                    position:'relative',
                    zIndex:1
                  }
                }
            >
             {props.children}
           </div>
};
现在修改Box组件,开启相对定位,并设置了z-index为1,结果页面变成了这个样子:

和上图对比,显然橙色的box没有被盖住,这是为什么呢?首先我们来看看他们的结构:
<App>
    <绿色Box>
            <遮罩/>
    </绿色Box>
    <橙色Box/>
</App>
绿色Box和橙色Box都开启了定位,且z-index相同都为1,但是由于橙色在后边,所以实际层级是高于绿色的。由于绿色是遮罩层的父元素,所以即使遮罩的层级是9999也依然盖不住橙色。
问题出在了哪?遮罩层的作用,是用来盖住其他元素的,它本就不该作为Box的子元素出现,作为子元素了,就难免会出现类似问题。所以我们需要在Box中使用遮罩,但是又不能使他成为Box的子元素。怎么办呢?React为我们提供了一个“传送门”可以将元素传送到指定的位置上。
通过ReactDOM中的createPortal()方法,可以在渲染元素时将元素渲染到网页中的指定位置。这个方法就和他的名字一样,给React元素开启了一个传送门,让它可以去到它应该去的地方。
3.2 Portal的用法
- 在index.html中添加一个新的元素
- 在组件中中通过ReactDOM.createPortal()将元素渲染到新建的元素中
在index.html中添加新元素:
<div id="backdrop"></div>修改Backdrop组件:
const backdropDOM = document.getElementById('backdrop');

const Backdrop = () => {
  return ReactDOM.createPortal(
  		<div
           style={
                  {
                    position:'fixed',
                    top:0,
                    bottom:0,
                    left:0,
                    right:0,
                    zIndex:9999,
                    background:'rgba(0,0,0,.3)'
                  }
                }
           >
 		 </div>,
      backdropDOM
  );
};
如此一来,我们虽然是在Box中引入了Backdrop,但是由于在Backdrop中开启了“传送门”,Backdrop就会直接渲染到网页中id为backdrop的div中,这样一来上边的问题就解决了
3.3 通过 Portal 进行事件冒泡
尽管 portal 可以被放置在 DOM 树中的任何地方,但在任何其他方面,其行为和普通的 React 子节点行为一致。由于 portal 仍存在于 React 树, 且与 DOM 树 中的位置无关,那么无论其子节点是否是 portal,像 context 这样的功能特性都是不变的。
这包含事件冒泡。一个从 portal 内部触发的事件会一直冒泡至包含 React 树的祖先,即便这些元素并不是 DOM 树 中的祖先。假设存在如下 HTML 结构:
<html>
  <body>
    <div id="app-root"></div>
    <div id="modal-root"></div>
  </body>
</html>
在 #app-root 里的 Parent 组件能够捕获到未被捕获的从兄弟节点 #modal-root 冒泡上来的事件。
// 在 DOM 中有两个容器是兄弟级 (siblings)
const appRoot = document.getElementById('app-root');
const modalRoot = document.getElementById('modal-root');

class Modal extends React.Component {
  constructor(props) {
    super(props);
    this.el = document.createElement('div');
  }

  componentDidMount() {
    // 在 Modal 的所有子元素被挂载后,
    // 这个 portal 元素会被嵌入到 DOM 树中,
    // 这意味着子元素将被挂载到一个分离的 DOM 节点中。
    // 如果要求子组件在挂载时可以立刻接入 DOM 树,
    // 例如衡量一个 DOM 节点,
    // 或者在后代节点中使用 ‘autoFocus’,
    // 则需添加 state 到 Modal 中,
    // 仅当 Modal 被插入 DOM 树中才能渲染子元素。
    modalRoot.appendChild(this.el);
  }

  componentWillUnmount() {
    modalRoot.removeChild(this.el);
  }

  render() {
    return ReactDOM.createPortal(
      this.props.children,
      this.el
    );
  }
}

class Parent extends React.Component {
  constructor(props) {
    super(props);
    this.state = {clicks: 0};
    this.handleClick = this.handleClick.bind(this);
  }

  handleClick() {
    // 当子元素里的按钮被点击时,
    // 这个将会被触发更新父元素的 state,
    // 即使这个按钮在 DOM 中不是直接关联的后代
    this.setState(state => ({
      clicks: state.clicks + 1
    }));
  }

  render() {
    return (
      <div onClick={this.handleClick}>
        <p>Number of clicks: {this.state.clicks}</p>
        <p>
          Open up the browser DevTools
          to observe that the button
          is not a child of the div
          with the onClick handler.
        </p>
        <Modal>
          <Child />
        </Modal>
      </div>
    );
  }
}

function Child() {
  // 这个按钮的点击事件会冒泡到父元素
  // 因为这里没有定义 'onClick' 属性
  return (
    <div className="modal">
      <button>Click</button>
    </div>
  );
}

const root = ReactDOM.createRoot(appRoot);
root.render(<Parent />);
点击click后,可以发现数字从0变成1了

子组件Child的点击事件能冒泡到父组件Parent ,触发父元素的点击事件
在父组件里捕获一个来自 portal 冒泡上来的事件,使之能够在开发时具有不完全依赖于 portal 的更为灵活的抽象。例如,如果你在渲染一个 <Modal /> 组件,无论其是否采用 portal 实现,父组件都能够捕获其事件。
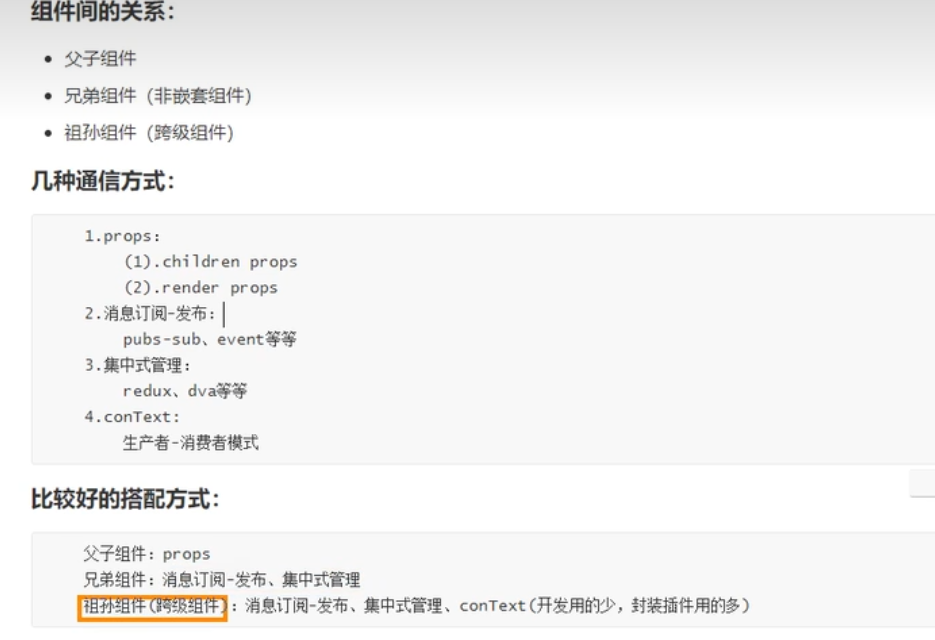
4、组件之间通信方式

